VASES
We have 25 years of experience and know-how based on controlled results in effective acoustic emission applications in different parts of the world. Our differential, in addition to the use of well-established methods, the use of state-of-the-art devices and software is our specialization in “Equipment Inspection”.
Our methods for continuous monitoring, mainly of damaged equipment, are based on a deep and specialized analysis of the mechanical behavior of the equipment, deterioration mechanisms, nucleation kinetics and associated damage propagation and study of process variables.
Access to acoustic emission data is done online, via the internet. For the analysis of the generated data and conclusions, the data collected periodically by our technicians on the “sites” for the collection of process information, verification of devices and calibration of sensors are considered.
The acoustic emission examination is divided into the following important phases:
1ST PHASE
EXPERT
ENGINEERING PLANNING
– Process data collection, design, operation history, inspection and maintenance;
– Elaboration of the test procedure, based on the evaluation and interpretation of the collected data, the test objectives and the applicable standards, by specialized engineering².
2ND PHASE
TEST EXECUTION
The tests are performed with equipment and software¹ technologically up-to-date and state-of-the-art.
3RD PHASE
ANALYSIS AND
INTERPRETATION
The test results are interpreted and evaluated according to the objectives defined in the procedure, by specialized engineering². The results clearly indicate the locations of the discontinuities and the most suitable non-destructive exams for their identification and dimensioning (include conventional and non-conventional techniques) and their “significance”. The data are interpreted together and by channel, through the application of specific techniques to identify the type of source and its significance.
4TH PHASE
CONCLUSIONS AND RECOMMENDATIONS
Recommendations are issued in the form of “planned drawings to scale”, containing the location of the regions to be inspected and the non-destructive testing techniques recommended for each of them. Our technical team is willing to assist in identifying the locations to be inspected by other techniques on the equipment during inspections, when applicable.
5TH PHASE
ISSUANCE
OF REPORTS
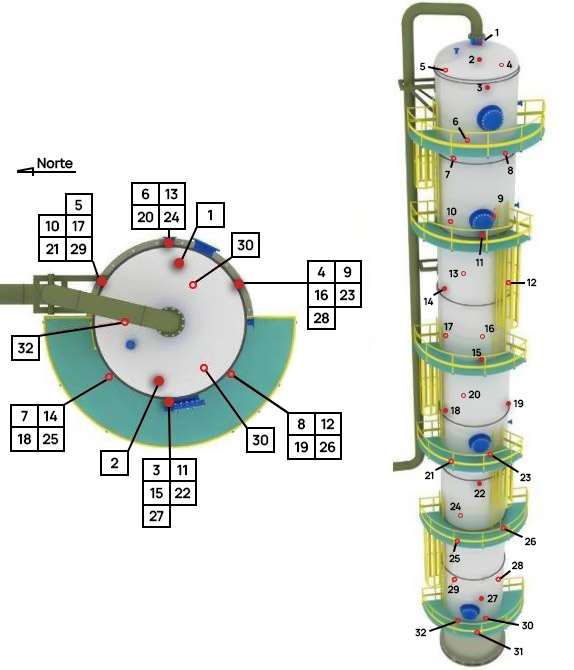
Reports include all information generated during testing, analysis and conclusions. The positioning of the sensors is done in 3D drawings, to facilitate their location and correlation with the physical characteristics of the equipment. Active and designated inspection regions are mapped on flattened drawings to scale.
1 – EQUIPMENT AND SOFTWARE: We use state-of-the-art equipment manufactured by Vallen System, the only equipment certified by TUV. EA data analysis is performed by the latest revision of specific software.
2 – SPECIALIZED ENGINEERING: Team composed of engineers and technicians with proven experience (more than 20 years) in the area of inspection, deterioration and evaluation of equipment integrity, and acoustic emission. The engineers Cláudio Allevato and Mauro D. Araujo are part of the team.

